First Birthday Party Hat

I ventured out one morning to a party supply store to look for a cute, flower-themed first birthday hat and was (to say the least) disappointed in the selection available. That night, once I put the girls to bed, I set to work on making my own with supplies I had. The first step was to gather everything I needed. Here is what I used:
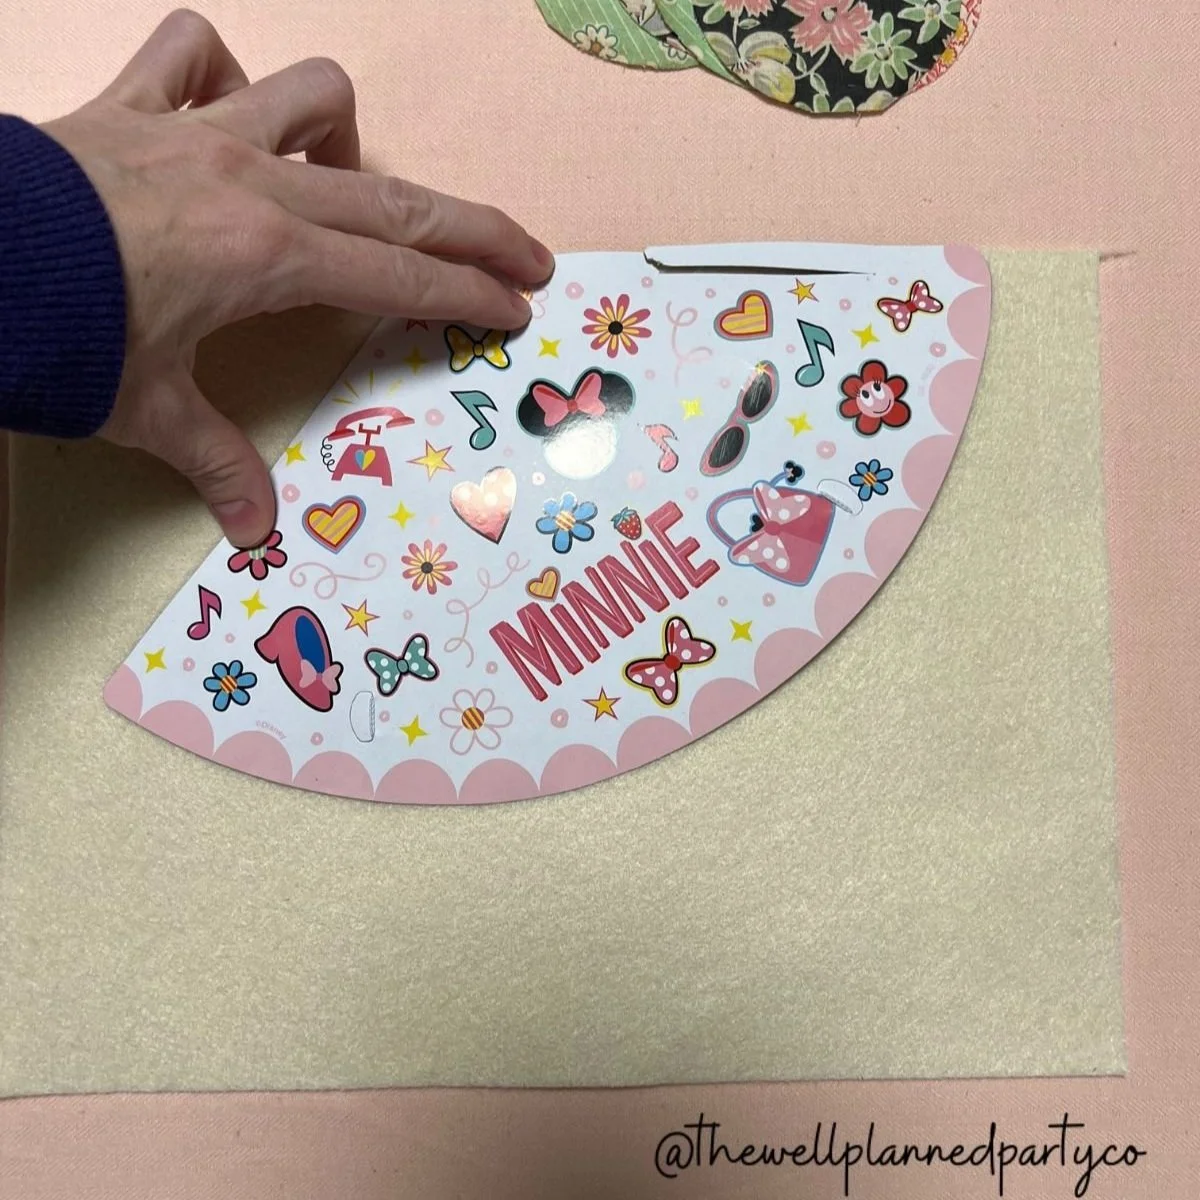
- A paper party hat as a template
- Cotton quilt batting (I think felt would work just as well)
- Ribbon/edging
- 3 different fabrics (scraps will work, because you do not need much!)
- Embroidery thread
- A puff ball or some other topper
I first ironed out the main fabric for the hat and placed the batting over it. I used the paper party hat as a template and it worked perfectly! If you don’t have one on hand, you can click here to download my free template. The circular fabric I used was from an unfinished quilt my grandmother gave to me and I thought it added a sentimental touch and also went with my theme…wildflowers!
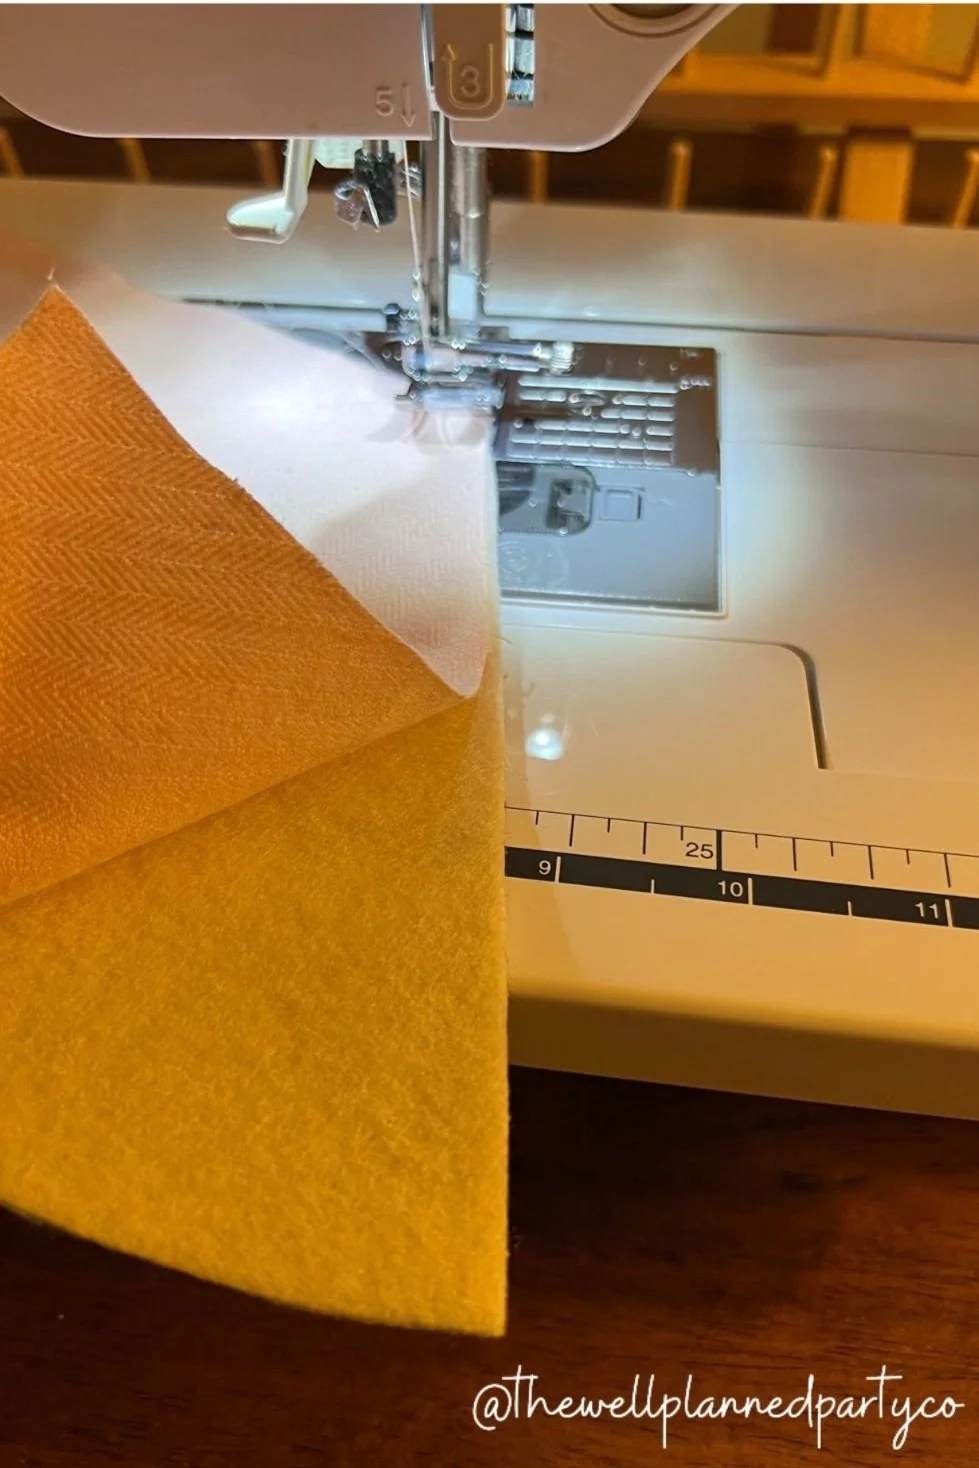
I put the batting and the main fabric wrong sides together and stitched around the top of the triangle with a quarter inch margin. I left the bottom, rounded part unfinished. This does not need to be perfect!
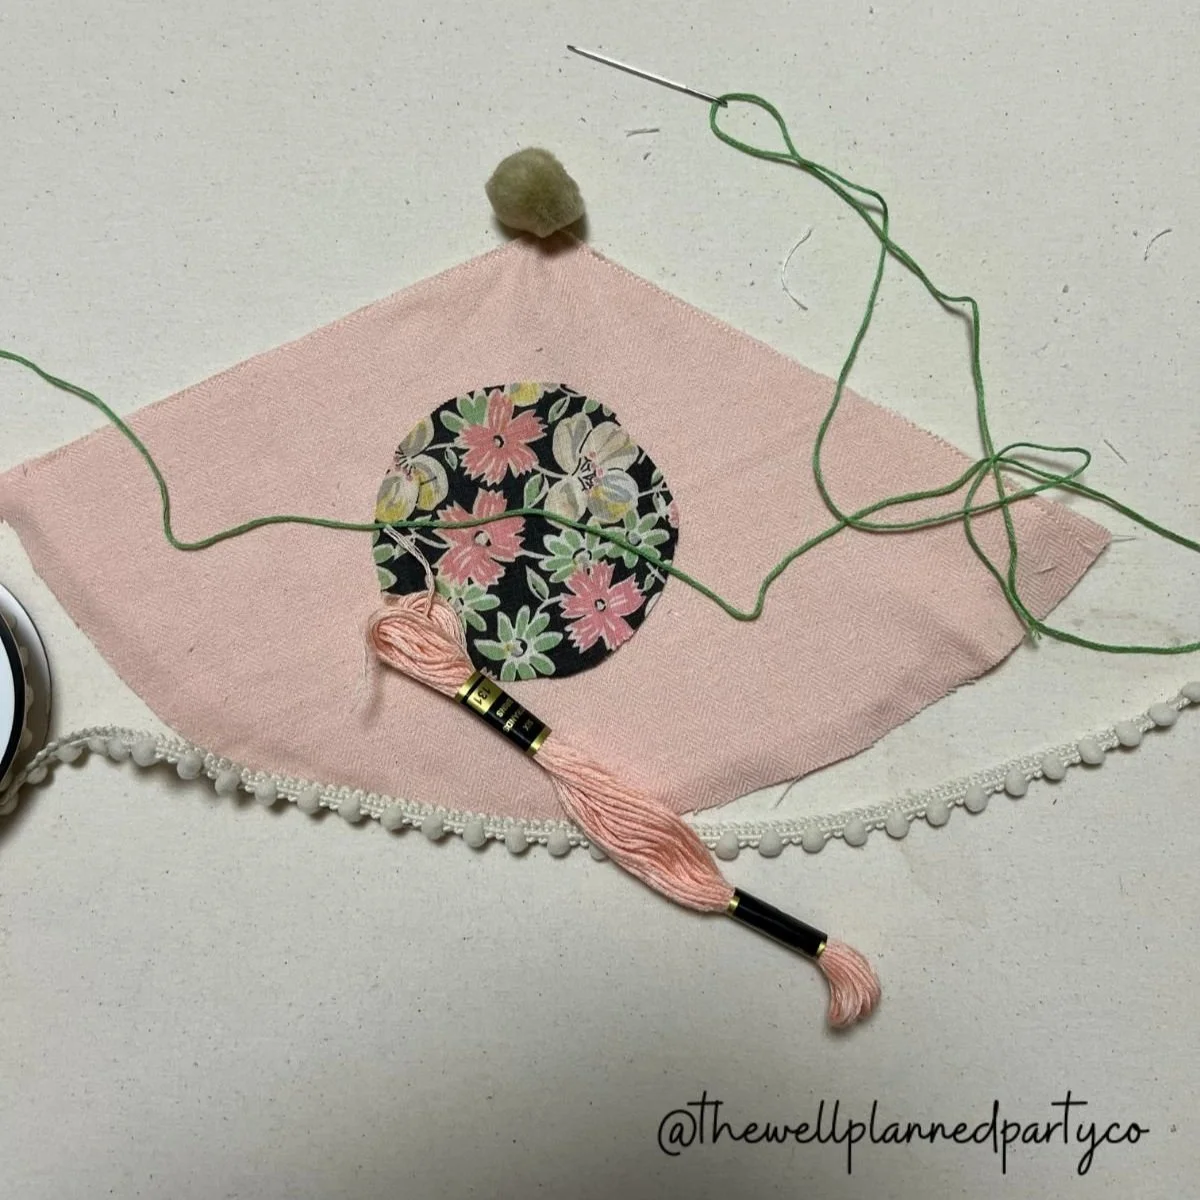
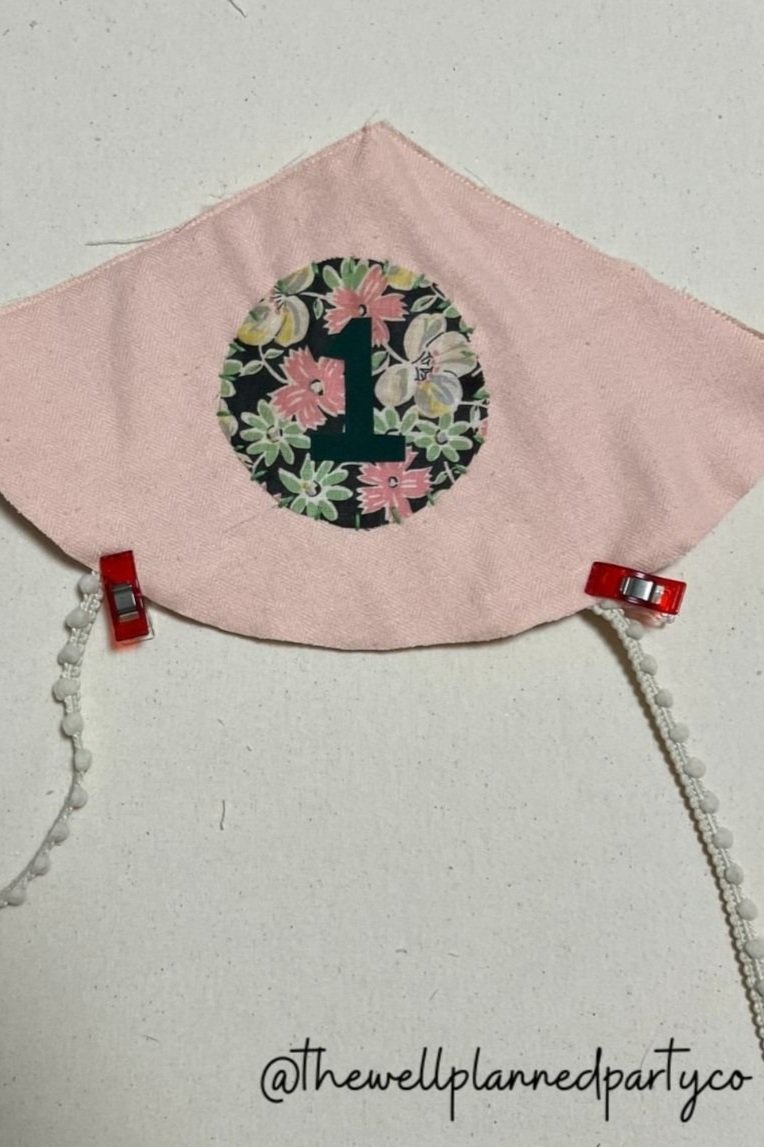
While the hat was still flat, I glued the number to the pre-cut circle and stitched that with embroidery thread onto the hat. I freehand cut the number, but if you want something more fancy, you could always trace one.
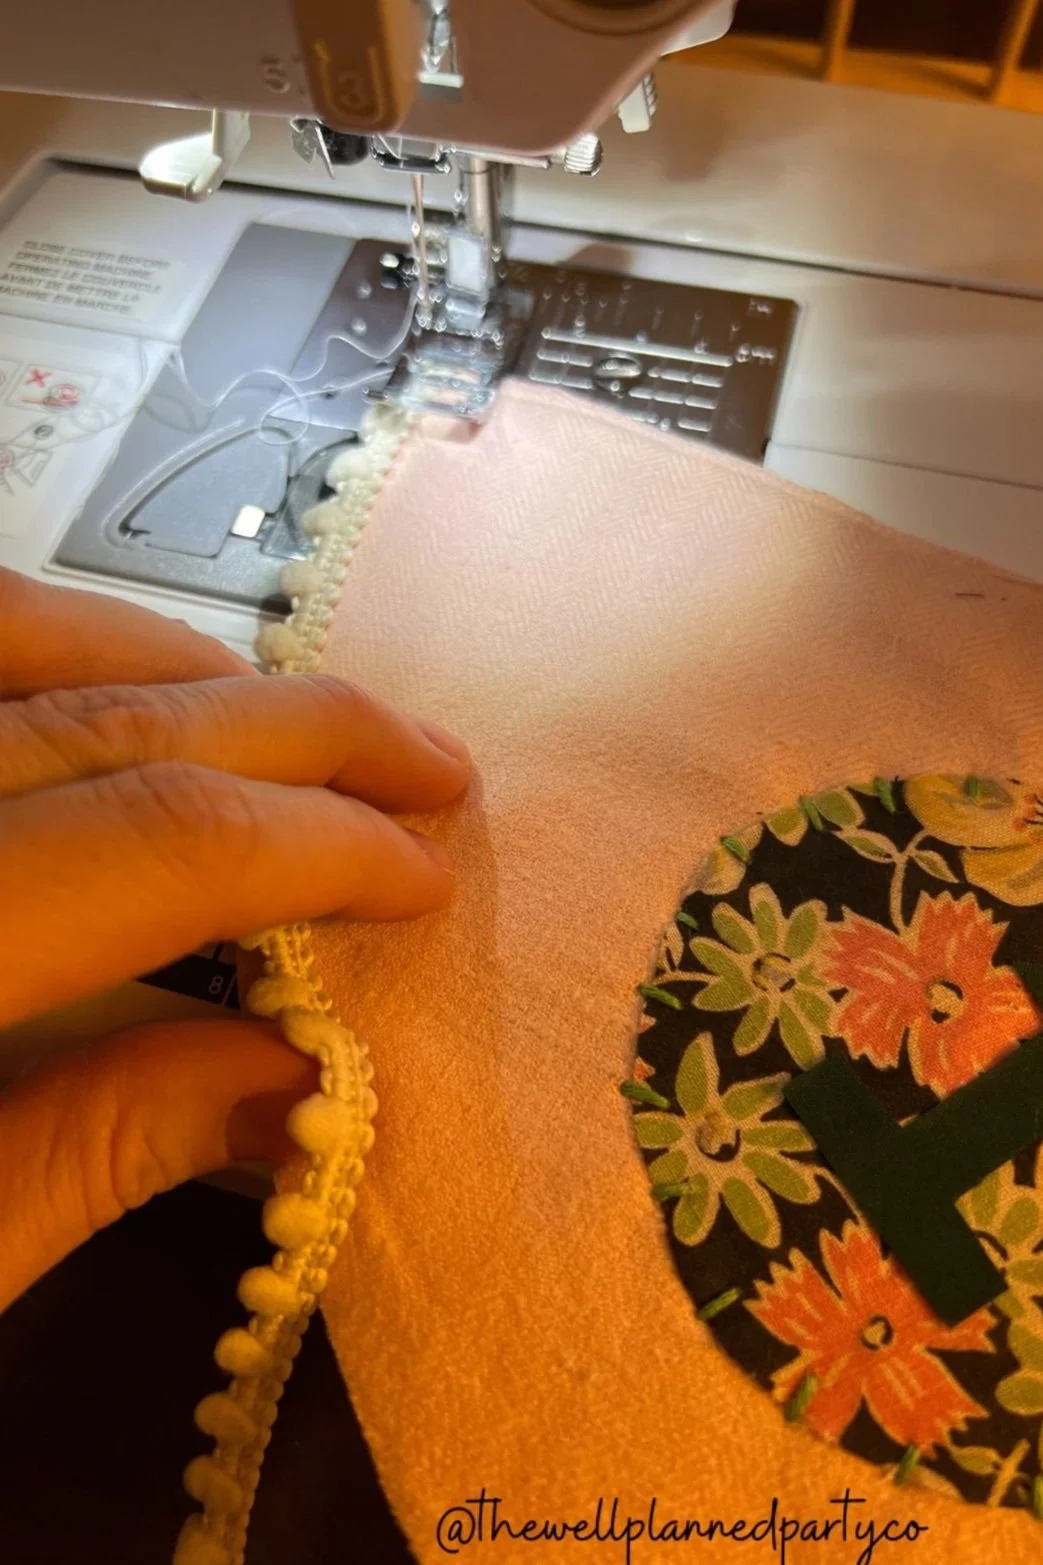
I was unsure of how well the ties would work, but just placed the ribbons where it looked right. I secured them with my small quilt clips and stitched/backstitched them with my machine. To finish it up I sewed the ribbon edging along the bottom of the hat. I didn’t pin it down and was careful to “catch” all of the layers in my stitching.
To secure it, I handstitched the seam together. You could always hot glue it, but I chose to use a light colored thread and could barely see the seam in the back. For the topper, I used a khaki colored puff ball from another craft and secured it with a drop of hot glue. Voila! I now have a beautiful party hat that not only has sentimental value, but is cute!